Saturday, December 26, 2009

Christmas Crap and a Handmade Pledge

Well another Christmas has come and gone. And one thing I've noticed growing over the past several years is that this holiday more than others, makes me more and more depressed.

Don't worry. It's nothing serious. It only seems to last a short while, as everything I've witnessed over the frenzied holiday season helps me become more and more passionate about what I do.

But I'm finally beginning to understand what it is that really bothers me about this holiday.

It's all the crap. And by crap, I mean landfill. And I'm not just talking about the wrapping paper, the plastic packaging, the cardboard boxes, the bows and all of that rubbish. I'm talking about the presents themselves. Have any of you noticed how much of that stuff is just crap?

I have young nieces and nephews and I sit quietly in the background and watch them tackle all their new loot. Some of it was broken before it even left the factory/store. Some of it breaks trying to put it together. Some of it is broken after the first attempt at using it. Some of it breaks by the end of day one. And then what? It's off to the landfill. Garbage. Petroleum based products, made in China and elsewhere by people who work far too long for far too little. It's packed in container ships fuelled by more petroleum and shipped half way around the world, to sit in energy-hungry stores, filled with workers who again, work for far too little. And for what? So kids can have 'stuff' to open on Christmas morning?

What's the point of having 'stuff' anyways? Especially if it's just crap that's broken before it can even really be enjoyed? Do the benefits of all of this 'stuff' really outweigh all the negative consequences?

I guess I'm growing cynical.

I Took The Handmade Pledge! BuyHandmade.org

For me, I take comfort in the fact that many of the presents from me to my loved ones this year were handmade and/or upcycled. Being a strong believer in 'what goes around comes around' I have made a conscious effort over the past few years to support my fellow artists and craftspersons. And while my reasons for doing so started out as perhaps a little selfish, I can see it has much further reaching consequences.

I understand that I have no control over what my loved ones actually DO with the gifts they get from me (and I'll admit it, some of them may even head to the landfill). But I hope that it sparks something in them, no matter how small, about the importance of handmade. I hope it brings to their attention just what it means to have quality made things, to support your communities. I am very aware that handmade work is expensive. But there's a reason for that, and surely LESS of BETTER stuff is way more important than MORE of CRAPPY stuff.

I hope everyone enjoyed their holidays this season, and that the gifts you received are ones that will be cherished (and functioning) for a long time to come! And to those of you who took the time and made to effort to buy handmade, thank you, for the consequences are far and reaching in ways that you cannot even imagine.

Cheers!
~Melissa

Wednesday, December 9, 2009

Feltware 2.0

Nothing like the thrill of a contest to light a fire under my feet.

Every year the One of a Kind Christmas Show has a contest. This year the theme was teapots. Each vendor was asked to make a teapot in the medium they work in. How could I resist?

During my last year in school, I focused on sculptural teapots, so this was an opportunity to go back to my roots, so to speak. And while I was excited and up for the challenge, it was terrifying.

Even I was surprised at how much pressure I was feeling over this silly little contest! Having gone to a high-profile art institute, I felt a lot of pressure to produce a spectacular piece. This was an opportunity for me to show my peers that I was capable of more than just production pottery - (though notably, some of my customers may not view my work as 'just production pottery', I can't help but feel that sometimes my potter friends view it as such, but that's a whole other issue, and no doubt mostly in my head, anywaaaays...)

Where was I? Oh yes. Pressure. Yup. Lots of it.

One of the ways I like to work out new pieces, is to throw the idea to my subconscious and let it stew there while my conscious forgets about it. A few days/weeks/months later, it usually spits something out that surprises and delights me and I can get busy manifesting that idea. This time was no exception. I knew I wanted something in feltware and let my subconscious do the rest.

Here's what I came up with:


The teapot is fully functional. And while it may not be the spectacular piece I was hoping for, over all I'm pretty pleased with it. It didn't win any awards at the show, but I did sell it (yay!) and I even had an order for another, smaller version.

And while I was finally getting back to the feltware I had started in the spring, I also made these:


No doubt now that my biggest show of the year is over and I finally have some much needed time to myself, I'll rework these pieces. My subconscious is still spitting out ideas (I can't seem to find that off switch!) so I've got all kinds of ideas I'm anxious to work out.

And all that pressure? It was pretty weird at the show to see people's reaction to the new feltware. Those familiar with my functional work were quite surprised, and those who saw the teapot before the functional stuff were surprised as well. After a few days of digesting people's reactions, the pressure melted away and I became excited about this new creative outlet that I've been looking for.

Now, if only I can manage a balance between the work pots and the play pots...

Wednesday, November 11, 2009

The Continuing Misadventures of Me and My Pugmill

Well, the pugmill drama continues...

Based on the suggestion of a fellow potter who commented on one of my previous blogs, I approached a plastics company to see if they could form a sleeve to fit inside the barrel of my pugmill. Unfortunately, this particular company was unable to help us, mostly because of the curve of the barrel at the extrusion end. But the fellow suggested we try an epoxy coating like ones used in elbows of pipes that carry grains and salt, and was even kind enough to give us a batch of the epoxy to use.

I was hopeful...


The first week went well. The epoxy seemed to be staying put. There weren't any more pesky chunkies buggering up my thrown work. And then, slowly but surely, I started finding the hints of chunkies. Small ones. But definitely chunkies. I brushed it off as dried bits of clay? maybe? hopefully?...

In the mean time my show in Ottawa came and went (thanks everyone, for a great show!) and when I got back, I had about 2 weeks to finish all the work I needed to get done for the remainder of my Christmas shows. So the first day back to work... pug some clay... start throwing...

CHUNKIES!

HUGE freaking chunkies. The size of m&m's.

And then...

EPOXY!

Yup. Slices of epoxy, coming off in the clay.
Shit.

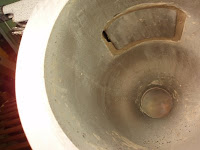
So we took apart the pug mill, cleaned it out, and here's what we found:


In some spots, the epoxy had peeled right off and was mixed into the clay. In other spots, it had let go of the aluminum and was acting like an envelope. From what we can figure, the pressure from the vacuum pulled the epoxy away from the aluminum and clay got stuffed between the epoxy coating and the pugmill barrel.

We still can't really figure out where the chunkies were coming from. They did not appear to be stuck to the epoxy. And the clay that had slipped between the epoxy and the barrel couldn't get into the mixing clay because the epoxy holding it against the metal was still in tact. And the small chunk of epoxy that DID break off, was fresh and the clay didn't have time to react yet.

Soooooo.....

Luckily, the rest of the epoxy peeled off like cheap nail polish but we're back to square one again.

So, either I give Peter Pugger a call (I'm sure they'll be ecstatic to hear from me!) and find out if they are willing to get the sleeve made, or I get my incredibly talented husband to machine me a new barrel out of stainless steel and be done with the whole problem. The materials for this would cost us about $1000.00, and my hubby has access to the equipment to get the job done. All we would need is the time...

Sunday, October 4, 2009

Keep Calm and Carry On

Well the past 10 days have been utterly crazy.

With winter on its way (I still CAN'T believe it's actually OCTOBER!!!!), it was time to rip out the north wall in our studio and replace the 4" of insulation, wasps nests and chipmunk droppings with 6" of new insulation and two new windows. At first we were hoping this would be a weekend project. In fact, we were hoping that when I returned from a weekend show it would all be done and things would easily get back to the standard pre-Christmas craziness.

Yeah, riiiiiiiiiiight.


The weekend turned into a full week of construction. Of course, nothing could go easily or smoothly, really it was naive to assume it would have! And it's pretty hard to get anything done when the routine has been thoroughly upset. And so, as a result panic set in. I'm frantically trying to get ready for all the the shows I've got coming up, to get wholesale and custom orders out the door and I have to time my pugging around when there's going to be space cleared around the pug mill. The entire week the old propaganda line: Keep Calm and Carry On, kept running through my head. At least it gave me something to smile about.

So after a full 10 days, things are ALMOST done. In addition to a new wall and two new windows, I now (almost) have another (desperately needed) drying cabinet. With a little bit of luck I'll be able to get back into full production mode this week and start feeling like I'm getting things done again.


Annnnnd of course,
now is the time I finally find myself teeming with some fantastic ideas for the direction I want to take my feltware.
(sigh...)

Yup. Keep Calm and Carry On...

Monday, September 7, 2009

They're BaaAAAAck!

Well, the last few weeks have been nothing if not completely frustrating.

So here I am, custom orders on the go, wholesale orders on the go, desperately trying to stockpile work for upcoming Christmas shows, frantically trying to replace stock that has sold at summer shows. I'm busy. VERY busy. And I don't really have time for things to fall apart.

But alas. It had to be...

Remember that problem I was having a while back with my brand-spankin' new pug mill? Where my clay was corroding the inside of the mixing barrel and pesky little chunkies were making their way into my pieces?

Weeeeeeelllll....

The pugmill manufacturer recommended that I add epsom salts to my clay body. What this would do, I was assured, was change the pH of the clay which would in turn, prevent all those pesky little chunkies from forming in my pug mill. Okay. No problem. 44 grams, dissolved in hot water, added to 25 lbs wet clay. Mix, pug, throw.

No problem, right?

WRONG!!! What a complete disaster. Have a look for yourself:


Yup. Three kiln loads and counting. Ruined.

After much crying, cursing, Clayart-ing and phone calls, here is what I learned:

Too much epsom salt can cause blebbing. As a piece dries, the salts migrate to the area of the pot that is drying the fastest (the rim in most cases). During firing, the salts will turn to gas and generally burn off. However, if there is too much salt, and the clay begins to mature before all of the gases have escaped, you will end up with what I have in the photos. Lots and lots of little blisters, all over the rims of a couple of thousand dollars worth of pots. As my luck would have it, my clay manufacturer ALREADY adds epsom salts to their clay. So by adding more, I overloaded the clay.

So there you have it folks. My advice: talk to your clay manufacturer before adding ANYTHING to your clay body. No matter WHO told you to add it.

Aaaaaaand in addition to that...

Those f'ing chunkies are back, busily corroding away at my pug mill.

Yup.

oh! And that would be the NEW version of the pug mill. The one with the corrosion-resistant coating.

Yup. My luck.

Thursday, July 9, 2009

The Perfect Pour


One of my favorite teachers from art school always said "if you're going to make functional pottery, use it!" So when I made one of my first functional teapots, I brought it straight into the house from the kiln and made a pot of tea. (Steeped for 5 full minutes for the perfect cup of Bourbon Vanilla). I picked up the teapot in great anticipation of my perfect cup of tea, and was horrified as the tea gurgled and blurbled out, down the side of the pot and everywhere but the mug, strategically placed beneath the spout.

I was so disappointed.

BUT...back to the drawing board.

Functional teapots are one of the biggest challenges for potters. They employ a great variety of throwing techniques, complete with lids, knobs and handles. They have to pour properly, hold enough tea, and not be too heavy. All of this adds up to a steep challenge. (No pun intended.)

So what exactly is it that allows a teapot to pour?

Well, first there's the obvious: the spout. Spouts need to be wide at the base and taper to a narrow opening at the end. This helps to push the tea out and far enough away from the pot to keep it from clinging to its side. But we're not done there. Spouts need to have a relatively sharp end to help cut off the flow of the tea as the teapot is righted. Unfortunately with pottery, too sharp will often lead to a chipped spout. If you can find a teapot that lets no more than ONE drip back down the outside of the pot, you've done good!

Spouts aren't the only important aspect to a good teapot though. The handle also requires some special considerations. Handles must be placed in such a way that the pot is balanced as the user is pouring the tea. This relieves strain from the wrist, and lets the pot do all the work. For best results, look for a 90 degree angle between handle and spout. The handles also need to be beefy enough to hold a full pot of tea. No one wants to see a full teapot release from its handle and go crashing to the table.

Some other small considerations include a wee little hole in the lid. Air needs to be able to enter the teapot as the tea is exiting to allow for a continuous, uninterrupted pour. And if the teapot is meant to be used with teabags, have a look inside to make sure there are holes creating a strainer of sorts, where the spout attaches to the pot. These will catch a teabag and prevent it from plugging the spout.


It's been a few years now since that first disastrous teapot of mine, which I still have. And I've abandoned the Bourbon Vanilla for a quieter Tongyu Mountain Green tea from one of my favorite tea stores, Distinctly Tea in Waterloo. But man, I do love a good cup o' tea.

Monday, June 15, 2009

Testing, Testing, 1,2,3...

Any potter will tell you that testing glazes sucks.
There is just no easy way to do it. It's time consuming and tedious, truly an evil necessity if one is looking for their own glazes that stand out in a crowd.

So I spent many hours this past week doing what I hate: testing glazes.

It has taken me many years to get to a point in glaze testing where I'm no longer rushing through it as fast as I can. I've made WAAAYYY too many mistakes doing just that. I've finally learned to slow down, clear my schedule for the afternoon, pull up a stool and get it done right.

So this time around I'm working on two different glaze bases: a glossy from the geniuses at Digitalfire, and a matte, a recipe that was given to me from the amazing and talented people at NSCAD. I will spend hours researching the colors that I am looking for: what ceramic oxides will yield what results, what ingredients are necessary in the base glaze to give the desired effect. I hunt down appropriate base recipes and calculate them using Insight, a downloadable glaze calculation program (highly recommend it!) and make sure all the numbers look good.

With all the research out of the way, I mix up 500g batches of each, with no colorants, and run each batch through a 120 mesh sieve. Then each glaze is weighed and divided into 5 different containers, all carefully marked with my trusty sharpie. It is at this point that the real test mixing begins. Colorants and stains are carefully measured into each well-labelled container (learned that the hard way, more than once!) and are then ready to be applied to test tiles.

I used to use lots of itsy-bitsy L-shaped tiles that I extruded. Each glazed surface was no more than 1" x 2". I have since moved on to larger surfaces. I found I just couldn't get enough information off of that small a surface. I need to actually SEE what the glaze is going to do, in the manner in which I'm going to be using it. Now I extrude tubes, about 3-4" tall, and 2 1/2" wide. This gives me lots of room to try as much as I need to on the same surface. Each tube is CAREFULLY labelled (also learned that the hard way, more than once!) and at the same time, I make very thorough notes in my sketchbook (again, the hard way...).

Glaze testing is painfully slow. After the research, there's the mixing. After the mixing, there's the firing. After the firing, you have to wait for the kiln to cool. After the kiln cools, you FINALLY get to look at the tiles, and inevitably, try to figure out what to adjust the next time around to get the results you are looking for. It can literally take weeks, months and even years to finally hit the jackpot and get what you were looking for in the first place. As frustrating as it is in the thick of it all, when you finally get that perfect glaze, all of that time spent doesn't seem so bad. It's like hitting pay dirt.

So for all of you out there who are also enduring glaze hell, hang in there! Without all the testing, you'll never find what you're looking for, and sooner or later your efforts will pay off.

Thursday, June 4, 2009

Stress and the birth of Ideas

About two weeks ago my very old Plymouth Voyageur Minivan died.

I was busy glazing away in the studio while my husband was out running errands. When he came back, he very slowly walked over to where I was working and cautiously asked: "So...........how's it going?"

"Fiiiiinnnnnnnnne......" I replied. I knew something was up. He never greets me like that.

"I have some bad news...." My first thought was something happened to all the pottery I have in tubs in the van that I cart back and forth to my weekly Art in the Park. "The transmission went on the van."

I honestly didn't know whether to laugh, cry or throw up. We knew it was coming. The poor van was 13 years old and had been with us from coast to coast.

Now these types of events never seem to time themselves so that it is convenient for US. And the last thing I needed was to spend what little I had saved up on another vehicle. (sigh). If you've ever gone through this sort of thing, then you understand just how much stress is involved. Need a new vehicle right away, have no other means of transportation and live out in the country. We stressed about what we could afford, we stressed about trying to find something we actually WANTED, we stressed about borrowing a car to get groceries, we stressed about the plans that now needed to be put on hold. Stress, stress, stress....STRESS!!!!

And in the midst of it all, the ideas began to flow. I haven't carried a sketch book with me everywhere I go, for a while now. I think I need to bring one along from now on. I couldn't believe it. Here I was, supposed to be looking for a new car, and all I could see were colours, blossoms, flowers, patterns, glazes and shapes. It was like the floodgates had opened and ideas were pouring out of me faster than I could get them all on paper. And these ideas were evolving, from one to the next.

I guess it was a bright spot on a temporarily gloomy horizon. Needless to say, we found the PERFECT vehicle. A truck like this one, in a lovely burgundy. And with it sitting comfortably in my driveway, the ideas are starting to slow down. Now I can take some time to digest them, work through them, and figure out what the hell just happened.

Tuesday, April 28, 2009

Maintaining My Creative Sanity and the Introduction of Feltware

Well. I've been making my current line of work for about 4 years now. I still get excited when my kiln is finally cool enough for me to peek inside. It still feels like Christmas when I finally get to unload it. And, I am still learning when it comes to my decoration, glaze application, throwing, trimming, and even my slab work. I've done my best to add some new pieces ever six months or so, but despite all my efforts, I absolutely fear the inevitable boredom that comes from doing repetitive work. I know its coming, and I dread its arrival.

Last year, I finally decided to get serious about this looming issue (Okay, LATE last year!). I am now making a conscious effort to work on NEW pieces. The year began with me adding a glaze test to at least one kiln load a week. Since I don't have a lot of 'extra' time for playing, this snail's pace turned out to be as fast as I needed to go. With glazes coming out of the kiln, ideas began to swirl, and after following several paths for a brief while, I've narrowed it down to a new line that I'm going to explore.

I call it Feltware.

I fell in love with knitting about 7 years ago when I moved back to Ontario from B.C. It gave my hands something to do during the week when I couldn't be in my studio. Once I got to be in the studio full time, however, my hands just couldn't muster up the strength to knit in the evenings. But I still found myself drawn to wool as a material.

Enter: felting.

MUCH easier on the hands. And results come a lot faster than just knitting. I started felting about the same time I started trying out the new glaze tests. The ideas merged and this is the results:


The bands of felt are actually felted right to these cups. They make a perfect barrier against the heat from a hot cup of tea or the freezing cold from a tall pint of beer. And they are just the beginning. I have some ideas of where I want to take the shapes, and of other forms that I could apply this technique to. I'm super excited!

Once I found my direction, branching into another line of work was not as daunting as I thought it would be. But like I just said, ONCE I found my path. Ask any artist and they will probably tell you they have more ideas than they know what to do with. So narrowing them down, to accommodate limited time can be a challenge, to say the least.

I'm happy with where I'm going with this work. There's a LOT of potential here for me. And while I can only move at a snail's pace in terms of making work different from my main line, I now have a direction to go in. And with that direction comes the motivation to MAKE that time.

Watch my etsy shop, I'll be posting these soon!

Wednesday, April 15, 2009

They always say...

They always say that the squeaky wheel gets the grease. I'm gonna have to agree with that.

You'll recall from my last post the problems I was having with my new pug mill. Well, I removed the paint as recommended by the company, and sure enough, within two weeks those pesky hard chunkies were back. My frustrations were growing, to say the least.

So I posted a comment on Clayart, an online clay forum, about the issue of porcelain in my Peter Pugger. I explained what had happened and wanted to know what others had done about the situation. My timing couldn't have been better. It just so happens that the same week I posted my question to Clayart, that ceramic gurus, industry reps, galleries, schools and enthusiasts were meeting for the annual NCECA conference and someone was kind enough to pose this question directly to Peter Pugger. Apparently there were others in my position who were also frustrated.

The company was aware of the problem and were currently working on the solution. I couldn't be happier! I called the company first thing the following Monday morning and was immediately passed on to the owner. They offered to help me resolve the problem right away. I must say, the customer service was amazing. They explained to me what was going on, that it's the alkalinity of the clay that's corroding the aluminum. Just the fact that they seemed to know what was causing the problem has led me to believe that they have thoroughly researched the issue and that their fix will work.

I know that other people, with other types of pug mills have not been so lucky in dealing with other companies. So I guess I got the right machine after all, especially considering the price tag of some of the others!

Friday, April 3, 2009

Perhaps I should have listened to my gut...

The past few weeks have been somewhat frustrating to say the least. I have recently changed clay bodies. Having had repeated problems with the one I had been using, I decided to try a new one.

Great. No problem. Until I opened up my pug mill to clean it out. Ughhhh!

So porcelain will react with certain alloys in metals. I knew this (although I confess I didn't exactly know what 'react' meant) and researched pug mills accordingly. When it came time to buy one, due to some injuries, the Peter Pugger VPM-9 was recommended to me. After reading testimonials, I decided 'sure, why not!' and that's the one I brought home. After about a month of loving this particular little machine, I started to find little hard chunks in my clay as I was throwing. These pesky, hard bits made throwing and trimming incredibly frustrating, and after firing, led to lots and lots of seconds. These bits bulged out and fired a different color. Grrrr! I figured it was just more 'stuff' in my clay, that I had been having issues with for some time, but when it was time to clean out Piggy (which the pug mill was affectionately nicknamed) I was shocked to find those pesky hard bits stuck to the inside of the pug mill. And they appeared to be stuck ONLY where there was some over-spray paint on the inside of the mixing barrel.

You'll notice in the image on the top, all the little bits stuck to the inside of the pug mill. When they finally break off, they take the paint with them. Turning your attention to the image on the bottom, you'll see that there is absolutely NO little bits stuck to the parts of the pug mill that have no paint.
I called Peter Pugger for some advice and they suggested Airplane Paint Remover so that's what we did. Sprayed the inside, waited, scrubbed out all the paint we could. And now we wait. I hope, hope, hope (finger's crossed) that these little chunkies don't return. I've got about three more weeks to find out. (Sigh) The most maddening part is, I WANTED the stainless steel pug mill from Venco, (which was considerably more expensive) but got the Peter Pugger on recommendations from my supplier and other users. Perhaps I should have listened to my gut...

Sunday, March 22, 2009

Inspiration

My sister, my mother and I went out for a ladies night out this week to enjoy some delicious Thai food. Jen (my sister) was talking about how she's interested in trying out some creative things, specifically painting and asked me the simple question: "Where do you find your inspiration?".

I was stumped.

I had no idea how to answer that question. Inspiration, for me, is just something that's there. I've never really given it much thought, I mean really thought about it. I get asked this question at shows every once in a while, and I usually respond with simple answers: "Oh, from everything around me!" (Pretty non-committal, really...) But I sincerely wanted to help my sister get started on her creative endeavours.

Later on in the conversation, my sister related a story from her work (she's in early childhood education). She had a class of kids make pepper prints. For anyone who doesn't remember what these are, it involves cutting a pepper in half, dipping it in tempra paints, and stamping it all over a piece of paper. Voila! Pepper prints. One little boy noticed as he was pepper printing, that the paint pulled away from the paper and left little raised spikes if he lifted the pepper away slowly and straight up. He then proceeded to carry on with this 3-D painting all over his page, covering it in tempra mountains and spikes. Jen went on to talk about how children are free from a lot of baggage at that early time in their lives. They have no idea what a 'pepper print' is supposed to look like, what's right or wrong when it comes to pepper prints. And she related how when the parents got involved, it inevitably turned into something to the extent of "oh no dear, that's not how you do it, this is how you do it..."

Dinner continued, dessert followed (mmmmmm, sticky rice with mango....) and we came back to the studio for a quick felting lesson for my sister. The night ended, all was well. But that question never left me. I asked Dan (my partner, also an artist): "Where do you find inspiration?" His response was pretty much the same as mine: "I don't know, it's just kinda there." So where IS there? And that's when it hit me. The pepper print. When that little boy pulled that pepper away from the paper and for the first time noticed the spikes of paint, that's where inspiration is. It's in those spaces where we have no inhibitions, where we have no expectations, where we are seeing things as if for the first time, noticing the details that otherwise get buried in our busy lives. It's in that corner of our minds where we don't know what it means to fail or succeed.

I think people pick up baggage as we pass through our lives. We are told by media what to wear, how to cut our hair, how to decorate our homes. We are taught in english class how to write an essay, in home ec how to cook simple foods. We are told how our lives ought to be. Grow up, go to college, get a job, get married, have kids, retire, the end. Some people never quite fit into those preconcieved notions, and manage to eek out an existance that works for them. Others manage to follow those expectations and seemingly make it to the end unscathed. But are they? We get so pressed into the ideas of how to live our lives that we don't really seem to live them. We can miss out on all kinds of experiences and discoveries because we stop looking for them. Our own creativity get stifled as we gain the notions of how hair should be cut, of how an essay should be structured. If we want to be inspired, we need to let go of all of those preconcieved notions. As would be said in Buddhism, we need to see with beginner's mind. Go for a walk and listen to the sounds, see the colours, feel the textures. We are surrounded by inspiration every day, everywhere we go, whether it's in a cubicle at the office (patterns in the carpet/ceiling/from the walls of the cubicles, your coworkers tie) or we're on a nature walk surrounded by beautiful plants, trickling waterfalls abd subgubg birds.

For me, I am inspired by the colours I see in the clothes that people wear. At one of my Christmas shows, a woman walked into my booth and immediately caught my eye. She was wearing a burgandy coat and had on a hand-knit, gray scarf. The colours really struck me and I'm working on some projects that incorporate those tones. Inspiration for forms comes out of the process of making the work. Paying attention to how the clay feels during its different stages of production, pushing it, moving it, seeing how far I can take it. The act of it spinning on the wheel creates rhythms for me to play with, exaggerate, interrupt. I did a lot of sewing in high school and I like to play, transposing those techniques onto clay. Books I have read on mathematics (yup, total nerd here...) got me thinking about how to divide up space, proportions, and balance.

I sincerely wish the best for my sister on her creative journeys. And I'm greatful that I was given the opportunity to explore this topic. I'll definitely remind myself of my beginner's mind, and be on the look out for new sources of inspiration around me.

And I'm curious to hear about the source of inspiration for others...

Saturday, March 14, 2009

More felt, more glaze tests, more frustrations...

Okay. So this has been a rather long and somewhat frustrating week. I managed to get a glaze firing in, along with some of those tests that I am working on. You'll recall from my last post, the problems I was having with my glaze running too much


I mixed up a couple more tests. Both tests are an altered version of the original matte glaze recipe, G1214Z from Digitalfire. I changed the glaze with my Insight Glaze Calculation Program to allow for a 5% increase in Silica. I thought I'd start with this alteration in my tests because it would help to stiffen the glaze and keep if from running, by slightly bumping up its firing temperature. I'm not very happy with the results. The tile on the left has no opacifier, the tile on the right does. You'll notice that I managed to correct the problem of the glaze running too much, but I think I prefer the matter surface of the original glaze recipe. So back to the testing... I think the next round, I'll work on the levels of EPK. If I increase the EPK and the silica at the same time, I may be able to both fix the running, and push the surface more matte. If I simply remove the extra silica and increase the alumina (EPK), then I'll make the glaze more matte than the original, which I don't think is what I want to do. I have to be careful adding too much more EPK, because that can cause the glaze to crawl. Here's an article about this glaze recipe, for further reading.

Back to my felting, I've started decorating some of the tiles I was working on last week:

The small piece on the right is a test piece I tried. The red stripe was wet-felted in place. This creates a very soft and fuzzy line. For the tile on the left, the red lines were added by needle felting. The two colours of wool do not blend the same and the red is much crisper. Personally, I'm leaning towards the look on the right. So I guess I'm testing more of this as well. (I see lots of testing in my future...)

I found some craftspeople online who are willing to answer my questions about felting so now I've got some brains to pick. The RagingWool has offered to help me (I know! Great name!) and so has LaLaFelt who has some amazing roving in stock!

So I'm off for another week of testing: glazes and felting. Enjoy!


Sunday, March 8, 2009

Feltware

I've been hard at work trying a bunch of new glaze recipes for a line of work I'm going to call 'Feltware'.

After trying several cone 6 matte glaze recipes, I've decided to narrow it down to this one that I got off of the Digitalfire website


I'm loving the glaze. It mixes well and goes on very easily. It also has great colour response. I'm currently looking for a dark, slate gray. My first tests gave me this:

The surface is incredible! There is so much depth to the color, it's fantastic! HOWEVER, see those runs? The next few tests made a mess of my kiln shelf. NOT GOOD.

Soooooooo, a few more tests:

The first picture, confusingly marked '2', is the above mentioned glaze recipe with twice the colorants as the original test piece. I was hoping that if the glaze was darker, I could apply it thinner and get the effect I was looking for. Aparently, I was wrong. (surprise, surprise!) The glaze has a distinctly green tinge to it. The second picture is that original recipe, from the first test above. I wanted to see if I could repeat the results. The answer is sort of. Oh boy. More testing in my future...

As you can see, I still have the problem of the running, and in defense of the glaze, I AM overfiring it by about a cone.

Soooo, back to the testing. I can increase the alumina in the glaze to help with the running but that will also make the glaze more matte, which is not what I want. If I want to keep the current matteness then I could increase the silica along with the alumina which would also raise the firing temp a bit, which would probably help me out anyways, so that's most likely the route I'll go.

As for the feltware, it's coming.
I'm really enjoying felting. I've been working on a series of tiles:

This roving I bought at Romni Wools in Toronto.

This particular colour, eggplant, came in a bag with red and black roving. I LOVE this color. And ordered more along with some complimentary colors from A Childs Dream

These tiles will look very different by the time I'm done with them. I'll just have to be patient and check the mail.

Friday, January 2, 2009

Recharged

Yesterday marked the end of a week long vacation in Canmore, Alberta to visit my brother. It was MUCH needed. It was nice to get away and get out of the studio for a while. A change of scenery has been very refreshing. I was able to mull over some of those beautiful tests from last month and have decided on a direction to take them. I am looking forward to working out these new ideas in the coming weeks.