Showing posts with label pug mill. Show all posts

Wednesday, November 11, 2009

The Continuing Misadventures of Me and My Pugmill

Well, the pugmill drama continues...

Based on the suggestion of a fellow potter who commented on one of my previous blogs, I approached a plastics company to see if they could form a sleeve to fit inside the barrel of my pugmill. Unfortunately, this particular company was unable to help us, mostly because of the curve of the barrel at the extrusion end. But the fellow suggested we try an epoxy coating like ones used in elbows of pipes that carry grains and salt, and was even kind enough to give us a batch of the epoxy to use.

I was hopeful...


The first week went well. The epoxy seemed to be staying put. There weren't any more pesky chunkies buggering up my thrown work. And then, slowly but surely, I started finding the hints of chunkies. Small ones. But definitely chunkies. I brushed it off as dried bits of clay? maybe? hopefully?...

In the mean time my show in Ottawa came and went (thanks everyone, for a great show!) and when I got back, I had about 2 weeks to finish all the work I needed to get done for the remainder of my Christmas shows. So the first day back to work... pug some clay... start throwing...

CHUNKIES!

HUGE freaking chunkies. The size of m&m's.

And then...

EPOXY!

Yup. Slices of epoxy, coming off in the clay.
Shit.

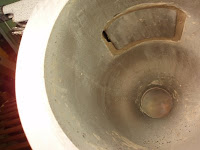
So we took apart the pug mill, cleaned it out, and here's what we found:


In some spots, the epoxy had peeled right off and was mixed into the clay. In other spots, it had let go of the aluminum and was acting like an envelope. From what we can figure, the pressure from the vacuum pulled the epoxy away from the aluminum and clay got stuffed between the epoxy coating and the pugmill barrel.

We still can't really figure out where the chunkies were coming from. They did not appear to be stuck to the epoxy. And the clay that had slipped between the epoxy and the barrel couldn't get into the mixing clay because the epoxy holding it against the metal was still in tact. And the small chunk of epoxy that DID break off, was fresh and the clay didn't have time to react yet.

Soooooo.....

Luckily, the rest of the epoxy peeled off like cheap nail polish but we're back to square one again.

So, either I give Peter Pugger a call (I'm sure they'll be ecstatic to hear from me!) and find out if they are willing to get the sleeve made, or I get my incredibly talented husband to machine me a new barrel out of stainless steel and be done with the whole problem. The materials for this would cost us about $1000.00, and my hubby has access to the equipment to get the job done. All we would need is the time...

Monday, September 7, 2009

They're BaaAAAAck!

Well, the last few weeks have been nothing if not completely frustrating.

So here I am, custom orders on the go, wholesale orders on the go, desperately trying to stockpile work for upcoming Christmas shows, frantically trying to replace stock that has sold at summer shows. I'm busy. VERY busy. And I don't really have time for things to fall apart.

But alas. It had to be...

Remember that problem I was having a while back with my brand-spankin' new pug mill? Where my clay was corroding the inside of the mixing barrel and pesky little chunkies were making their way into my pieces?

Weeeeeeelllll....

The pugmill manufacturer recommended that I add epsom salts to my clay body. What this would do, I was assured, was change the pH of the clay which would in turn, prevent all those pesky little chunkies from forming in my pug mill. Okay. No problem. 44 grams, dissolved in hot water, added to 25 lbs wet clay. Mix, pug, throw.

No problem, right?

WRONG!!! What a complete disaster. Have a look for yourself:


Yup. Three kiln loads and counting. Ruined.

After much crying, cursing, Clayart-ing and phone calls, here is what I learned:

Too much epsom salt can cause blebbing. As a piece dries, the salts migrate to the area of the pot that is drying the fastest (the rim in most cases). During firing, the salts will turn to gas and generally burn off. However, if there is too much salt, and the clay begins to mature before all of the gases have escaped, you will end up with what I have in the photos. Lots and lots of little blisters, all over the rims of a couple of thousand dollars worth of pots. As my luck would have it, my clay manufacturer ALREADY adds epsom salts to their clay. So by adding more, I overloaded the clay.

So there you have it folks. My advice: talk to your clay manufacturer before adding ANYTHING to your clay body. No matter WHO told you to add it.

Aaaaaaand in addition to that...

Those f'ing chunkies are back, busily corroding away at my pug mill.

Yup.

oh! And that would be the NEW version of the pug mill. The one with the corrosion-resistant coating.

Yup. My luck.

Wednesday, April 15, 2009

They always say...

They always say that the squeaky wheel gets the grease. I'm gonna have to agree with that.

You'll recall from my last post the problems I was having with my new pug mill. Well, I removed the paint as recommended by the company, and sure enough, within two weeks those pesky hard chunkies were back. My frustrations were growing, to say the least.

So I posted a comment on Clayart, an online clay forum, about the issue of porcelain in my Peter Pugger. I explained what had happened and wanted to know what others had done about the situation. My timing couldn't have been better. It just so happens that the same week I posted my question to Clayart, that ceramic gurus, industry reps, galleries, schools and enthusiasts were meeting for the annual NCECA conference and someone was kind enough to pose this question directly to Peter Pugger. Apparently there were others in my position who were also frustrated.

The company was aware of the problem and were currently working on the solution. I couldn't be happier! I called the company first thing the following Monday morning and was immediately passed on to the owner. They offered to help me resolve the problem right away. I must say, the customer service was amazing. They explained to me what was going on, that it's the alkalinity of the clay that's corroding the aluminum. Just the fact that they seemed to know what was causing the problem has led me to believe that they have thoroughly researched the issue and that their fix will work.

I know that other people, with other types of pug mills have not been so lucky in dealing with other companies. So I guess I got the right machine after all, especially considering the price tag of some of the others!

Friday, April 3, 2009

Perhaps I should have listened to my gut...

The past few weeks have been somewhat frustrating to say the least. I have recently changed clay bodies. Having had repeated problems with the one I had been using, I decided to try a new one.

Great. No problem. Until I opened up my pug mill to clean it out. Ughhhh!

So porcelain will react with certain alloys in metals. I knew this (although I confess I didn't exactly know what 'react' meant) and researched pug mills accordingly. When it came time to buy one, due to some injuries, the Peter Pugger VPM-9 was recommended to me. After reading testimonials, I decided 'sure, why not!' and that's the one I brought home. After about a month of loving this particular little machine, I started to find little hard chunks in my clay as I was throwing. These pesky, hard bits made throwing and trimming incredibly frustrating, and after firing, led to lots and lots of seconds. These bits bulged out and fired a different color. Grrrr! I figured it was just more 'stuff' in my clay, that I had been having issues with for some time, but when it was time to clean out Piggy (which the pug mill was affectionately nicknamed) I was shocked to find those pesky hard bits stuck to the inside of the pug mill. And they appeared to be stuck ONLY where there was some over-spray paint on the inside of the mixing barrel.

You'll notice in the image on the top, all the little bits stuck to the inside of the pug mill. When they finally break off, they take the paint with them. Turning your attention to the image on the bottom, you'll see that there is absolutely NO little bits stuck to the parts of the pug mill that have no paint.
I called Peter Pugger for some advice and they suggested Airplane Paint Remover so that's what we did. Sprayed the inside, waited, scrubbed out all the paint we could. And now we wait. I hope, hope, hope (finger's crossed) that these little chunkies don't return. I've got about three more weeks to find out. (Sigh) The most maddening part is, I WANTED the stainless steel pug mill from Venco, (which was considerably more expensive) but got the Peter Pugger on recommendations from my supplier and other users. Perhaps I should have listened to my gut...